Regor's Goldwing Scrapbook
[ Home ] [
Search ] [ About Us
] [ Submit Pics/Docs/Suggestion ]
("Submit" Turned off due to hacking
- Sorry )
Pick from the list below to see an accessory on a Goldwing
↓
↓
Get your tips here
↓ ↓
WingIt
Links
Support your Small
Business Owner
↓ ↓
Vendors
Please Sign
↓ ↓
↓ ↓
Misc Pics
Need your own Web space
1000MB 50GB Web Hosting
for only $9.95/month with no
contracts. PHP4, MYSQL, CGI,
SSH all included.
Click here!
Helmet Headset Tips
Back to Tips
By Regor
These tips may or may not be specific to the Chatterbox headset, so I wrote this up and placed in this generic Helmet Headset Tips section.
When installing a boom mic, the microphone is only on one side of the boom. To help riders with placement of the boom, manufacturers put a mark (in the case of Chatterbox - a white dot) on the boom. After installing helmet, position the boom (with cover over mic) aiming up, towards your mouth. Aiming it straight back may pick up noise due to air coming up under your helmet.
Yellow arrow signifies dot, to aid in microphone alignment. Blue arrow
signifies microphone pickup.
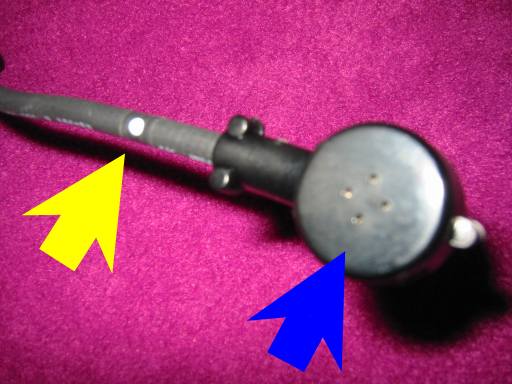
Blue arrow signifies Chatterbox white dot, microphone has cover installed.

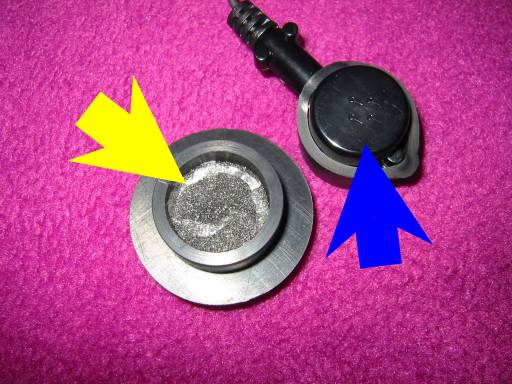
When installing a full-face mic, the microphone is also only on one side. There should be some type of barrier to aid in the reduction of noise. The first time I took a ride with my new full-face helmet with a Chatterbox noise reduction headset, I could not even hear or speak from all the noise. It was when I got home and realized that I did not install the foam noise barrier against the microphone.
Picture shows the
Chatterbox full-face mic, complete with foam noise reducing barrier.

Picture shows the Chatterbox full-face mic. The outside piece that holds the
foam is shown separately with the foam installed (yellow arrow), and shows
the microphone pickup (blue arrow).